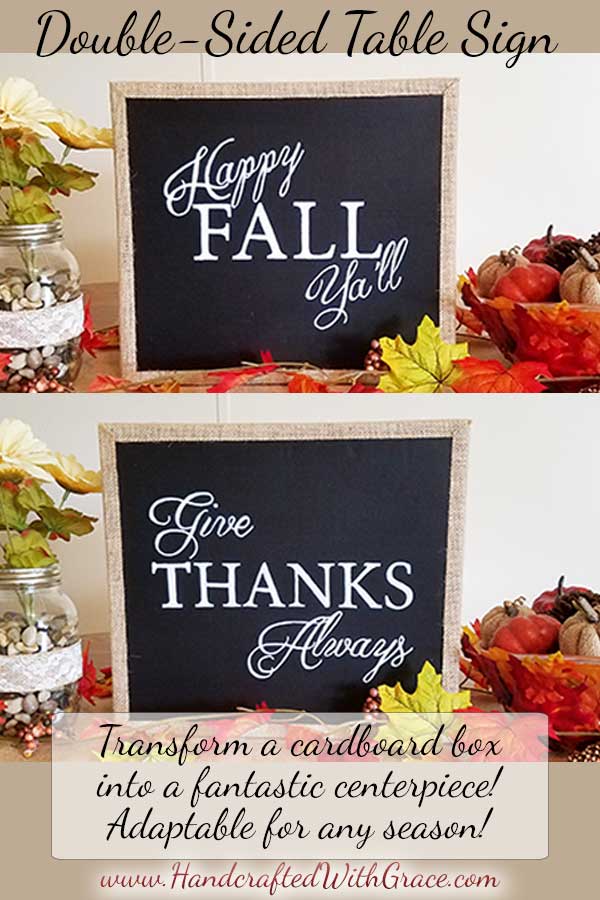
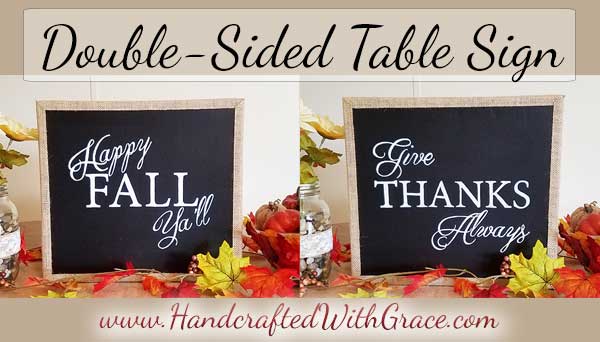
Well… I finally finished my Fall / Thanksgiving table centerpiece. The last project was a double-sided table sign made out of a cardboard box, chalkboard paint and some burlap and lace. It was incredibly easy to make. It turned out so cute! It looks fantastic as the focal point of my fall centerpiece.
I am sure you could make one like this for any season so I will be posting one soon for Christmas. But, in the meantime, how about we get started on how you can make a Double-Sided Table Sign of your own…
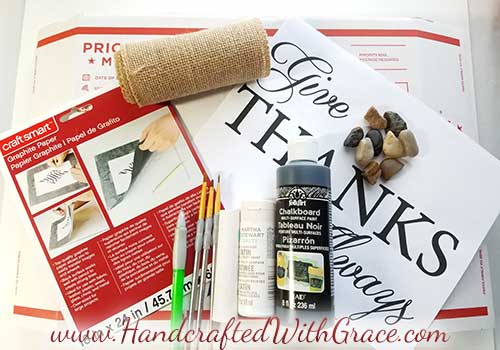
Supplies:
1 – Semi-skinny Cardboard Box (Left over large priority mail boxes work great!)
Some rocks for weight
Strong Glue (I used E6000)
Hot Glue Gun
Chalkboard Paint
White Acrylic Paint
Strip of Burlap (Length = outside diameter of box)
Strip of Lace (Same length as Burlap)
Printout of Lettering or Stencil
*If using printout of lettering – Graphite or Carbon Paper*
Step 1:
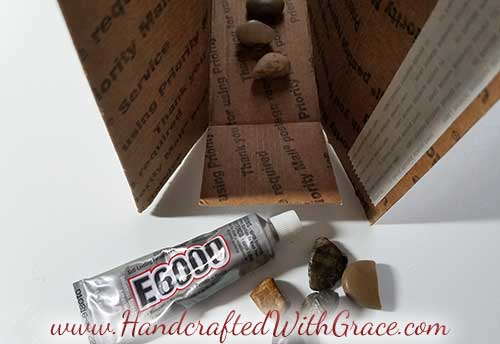
Prep your box by gluing some stones on the inside of the box to the side that will become the bottom of the sign. This is to give it some weight so the sign will not tip over so easily.
Then, seal the box up tight. You can either just use the sticky strips if your box is new or glue the box together if it has already been used.
Step 2:
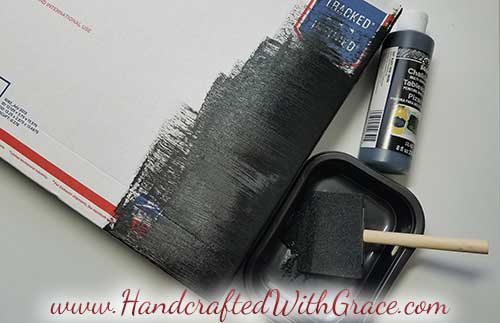
Paint over the entire box with chalkboard paint. Let dry and apply a second coat of chalkboard paint to the front and back side of the sign. There is no need to apply a second coat to the edges because they will be covered up with the burlap.
Step 3
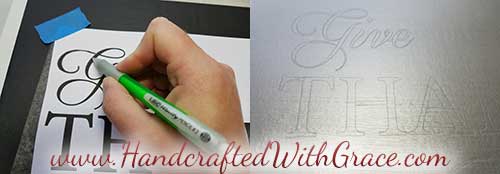
Once the paint is thoroughly dried, trace the printed design on the box. I used two different printouts, one that says “Give Thanks” and one that says “Happy Fall Ya’ll” so that the sign would be different on each side.
Even though all I had was the black colored graphite paper, the lines still showed up well enough on the chalkboard paint to be able to paint the lettering.
Step 4:
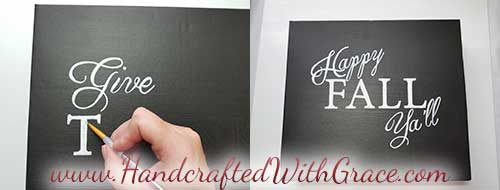
Paint the design on both sides of the sign. **Make sure you feel for the weight from the rocks so you don’t paint the sign upside down!!**
Step 5:
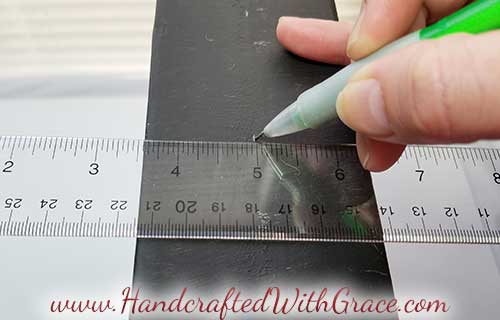
Mark the center of the edges of the box all the way around so your burlap will extend over both sides evenly.
Step 6:
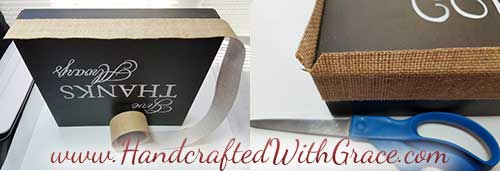
Glue (either with E6000 or hot glue, whichever you prefer) the burlap in place around the edge of the box to create a frame. I found this great burlap tape at Wal-Mart for just a couple of dollars but it wasn’t wide enough so I had to apply 2 strips. I just aligned the edge of the burlap tape with the markings from Step 5 so that it would be even all the way around.
You could very easily use any burlap or ribbon by just gluing it in place. Just make sure when you fold the burlap over the edge you miter the corners so it looks like a frame. I simply just cut the burlap tape at an angle as I was securing it in place.
If you do end up using the burlap tape like I did you may have to go back around the edges of the tape to secure it because my tape began to lift up a little. I just ran a small line of hot glue around the edge on the design side of the box to make sure it wouldn’t lift up.
Step 7:
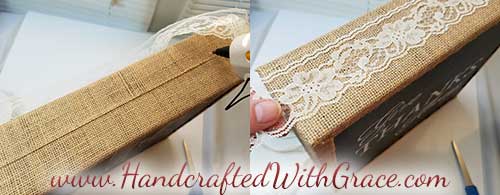
Glue your lace in place around the outside edge. The trick to gluing lace with hot glue to where it won’t make as big of a mess is to apply a thin coat of hot glue. I basically treated my hot glue gun like a pen and went over the area to be glued back and forth very quickly to create a large thin area of hot glue. I still had a small amount of glue seep through but it wasn’t a mess or anything.
There you go!! Your beautiful new Double-Sided Table Sign is complete. If you would like to you can add some more decorations to the two sides like perhaps some leaves, pine cones and acorns in the corner or something but I preferred to leave my sign the way it was so that it would be more versatile depending on what the rest of my centerpiece had in it.
I hope you enjoy your sign as much as I have. I paired it with my DIY Fall Leaf Bowl filled with dollar store pumpkins and some of my No-Sew Burlap Pumpkins, a mason jar that just had a small piece of lace covered burlap ribbon hot glued around it and filled with pebbles and flowers, all sitting on a burlap table runner with a strand of silk leaves laid on top. It really turned out quite cute!!!
You could easily place this sign on a mantle, table, or pretty much anywhere you would like to decorate. I would love to hear how you used your sign and what kind of design you used so please comment below. If you revamped the project for a different season or holiday I would love to hear about that as well. And please, don’t forget to share this tutorial by using the share buttons below.
Happy Fall Ya’ll! Now I am off to work on Christmas projects! YAY!!!

Such cute stuff keep posting
Thanks! I hope to post more soon. I have been working on a new bible study blog so I’m honestly not sure how soon though.